
How to Identify a Spider: Photo Clues and Quick Steps
Practical guidance to identify a spider from photos: what features to photograph, how to compare lookalikes, and when to verify expert help.
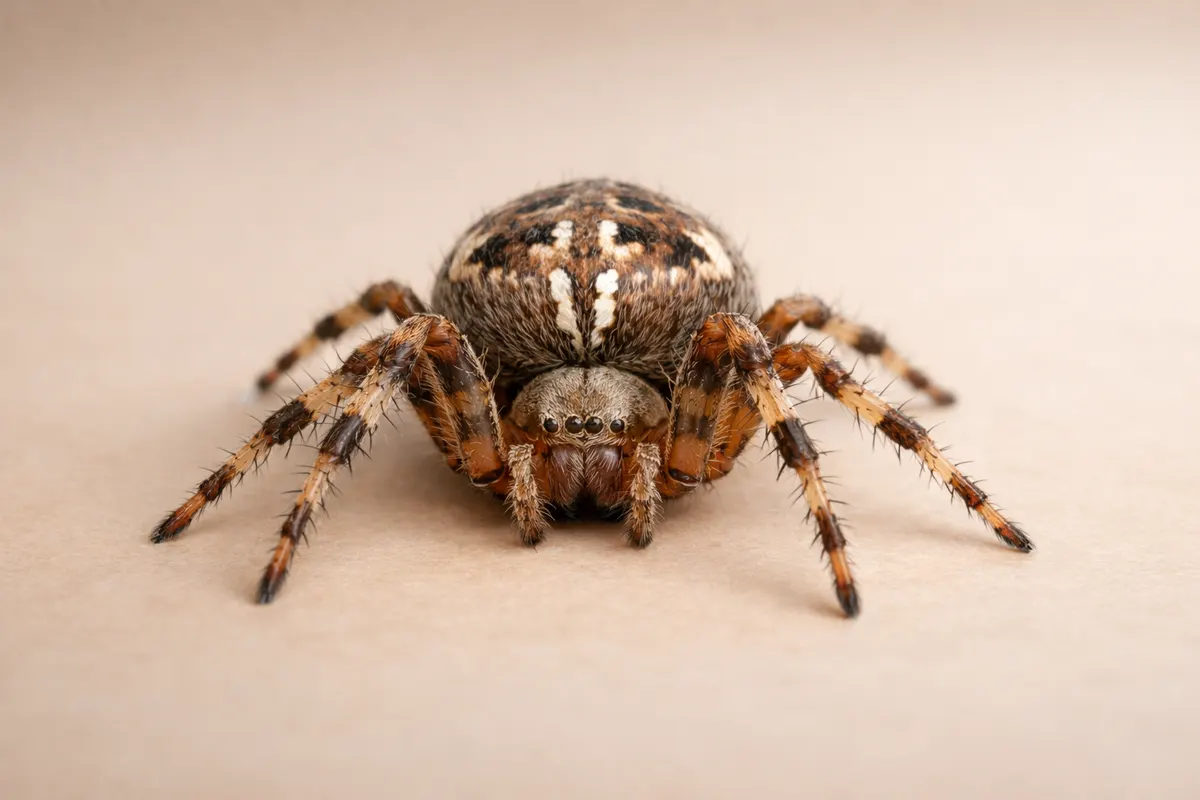
Quick answer: can you identify a spider from a photo?
You can often identify a spider to a broad group (for example orbweaver, wolf spider, jumping spider) from a good photo, but species-level certainty usually needs more evidence. Photos that clearly show body shape, eye arrangement, leg length and hair patterns let you narrow possibilities quickly. In many common homeowner situations, this is enough to decide whether a spider is likely harmless or if it warrants extra caution.
A single fuzzy or partial picture can mislead. Lookalikes such as harvestmen (daddy longlegs), ticks, or running insects with spider-like legs can be mistaken for spiders in poor images. When a public concern is about venom or medical risk, a photo is only a first pass — contextual clues and, when necessary, expert verification matter.
If your goal is to identify a spider to guide what you do next, use photos to check visible features, compare to field guides or trusted tools, and treat any high-risk possibilities as provisional until confirmed. The Spider Identifier tool at Bug Identifier is useful as a fast first pass after you gather clear photos and contextual notes.
What it means to identify a spider by sight
Identifying a spider means placing an animal into a taxonomic or practical category using visible features and context. In everyday practice that can mean: recognizing whether it’s a spider at all (versus a tick or harvestman), assigning it to a group like orbweavers or jumping spiders, or—less commonly—reaching species-level ID when diagnostic details are visible.
A clear photographic identification rests on three things: image quality, diagnostic features visible in the frame, and supporting context (where you found it, the web or lack of one, behavior). For example, a close-up of the eye cluster and front legs will be decisive for jumping spiders, while an image of a large round web and the spider’s posture points to orbweavers.
Practical identification also considers why you asked the question. People searching to identify a spider often want to know if the spider is dangerous, whether to remove it, or how to prevent similar sightings. Those practical decisions can usually be made at a group level without claiming complete taxonomic certainty.
Key photographic clues that help identify a spider
Start with the overall body plan. Spiders have two main body segments (cephalothorax and abdomen) and eight legs. If a specimen shows a single fused body segment or only six legs, you’re likely looking at a lookalike such as an insect or a tick. Note relative leg length and thickness: long thin legs that extend sideways suggest harvestmen, while stout front legs and a compact body suggest wolf spiders.
Eyes are one of the most diagnostic features but require a clear, close-up image. Count and arrangement of eyes distinguish major families: jumping spiders have a characteristic large front pair, crab spiders have a laterally placed set, and wolf spiders have a distinctive row pattern. When a photo can’t show eyes clearly, use behavior and habitat instead—web pattern, hunting posture, and time of day are strong secondary clues.
Surface texture, markings, and spinnerets matter too. Look for hair patterns, chevrons on the abdomen, distinct stripes, or visible spinnerets at the rear. A visible web type—orb-shaped, funnel, sheet, or no web at all—is often an immediate clue to family. Collect these visual notes in your caption or notes when taking the picture so you can compare them later.
- Body segments and number of legs: confirm it’s a spider (two parts, eight legs).
- Eye arrangement: jumping spiders have prominent front eyes; wolf spiders show a different row pattern.
- Leg posture and length: long, thin legs often indicate harvestmen (not spiders); stout legs suggest ground hunters.
- Web type and posture: orb webs point to orbweavers; no web plus active hunting suggests wolf or jumping spiders.
- Color patterns and hairs: chevrons, stripes, or dense hair can narrow family or genus.
Step-by-step workflow to identify a spider from photos
Capture the basics: take several clear photos from different angles—dorsal (top), ventral (underside) if safe, close-up of the eyes, and a wider shot showing the habitat and any web. Use natural light, steady your camera, and zoom rather than crop to preserve detail. Note when and where you found it (indoors vs outdoors, on a wall, in a web, under rocks) and any behavior you observed.
Make quick checks against visible diagnostic features: confirm there are eight legs and two body segments, check eye pattern when possible, look for a web and its structure, and record distinctive markings. Compare these observations against reliable references or the Spider Identifier tool to narrow to a family or group.
If the photo suggests a potentially dangerous species or if the situation affects health (possible bite, infestation), treat the photo identification as provisional and seek verification. Keep the specimen only if it’s safe to do so and required for confirmation; otherwise preserve your photos, habitat notes, and the time/date for follow-up by an expert.
- Photograph: multiple angles—top, side, close-up of eyes, full-body with context.
- Record: location, date/time, substrate (wall, vegetation, inside home), and behavior.
- Compare: web type, leg posture, eye pattern, and markings against trusted guides or tools.
- Flag: if the image hints at a dangerous species, avoid handling and seek verification.
Examples
Example 1 — A small spider on a windowsill has a compact body and prominent front-facing eyes in a clear photograph. Those features may support a jumping-spider shortlist, especially when they agree with the overall body plan and behavior. They do not establish an exact species or prove that an unknown spider is harmless. Keep your distance, avoid handling it for a closer photograph, and compare several visible features with an appropriate regional reference or expert opinion when certainty matters.
Example 2 — A large, hairy ground spider photographed at night running across a garage floor: the body shape, long legs, and behavior fit wolf spiders. These are often mistaken for more dangerous types, but nighttime activity, a lack of orb web, and a visible eye pattern in a close shot help separate them. Habitat notes (outdoor, on ground) support the ID.
Example 3 — A long-legged specimen in a shed appears to have a single, broadly joined body region. That combination may suggest a harvestman rather than a spider, but poor focus and viewing angle can hide body boundaries. Use a clear, safely taken photograph and several features to compare the possibilities. The example illustrates how a lookalike can change an identification shortlist; it does not establish the safety of handling the photographed animal.
Limitations: when a photo can’t provide a reliable spider ID
Photos can’t always resolve species-level identity. Many species differ only in microscopic genitalia structure, exact eye spacing, or subtle color tones that fade with age. If you need a precise species name for scientific, legal, or pest-control reasons, a photograph alone is often insufficient—physical examination by an expert or DNA barcoding may be required.
Image quality, angle, lighting, and partial views are common roadblocks. A crusted or damaged specimen, moulting spider, or juvenile may lack adult markings. Lookalikes such as ticks, certain bugs, and harvestmen can create false positives in poor images. Always state uncertainty when publishing an identification and document which clues support your conclusion.
Safety and medical risk require extra caution. Never try to handle an unknown spider to get a better photo. If you suspect a medically significant species or a bite that needs care, treat it as a potential health issue first—seek medical advice—and use photo evidence only to help clinicians and entomologists, not to replace professional assessment.
- High confidence: clear images showing eyes, body shape, and web type can narrow to family.
- Partial confidence: good photos that miss eyes or show only one angle may allow genus-level guesses.
- Low confidence: fuzzy, cropped, or single-angle photos can mislead and should be labelled uncertain.
- When to escalate: suspected venomous species, medical concerns, or regulatory/pest-control needs need expert verification.
Related guides
Want a fast first pass after you check the photo clues?
Use the Spider Identifier by Photo — What Spider Is This? tool at Bug Identifier as a quick way to flag likely matches after you collect clear images and habitat notes. Treat the tool as a first-pass filter: it helps you prioritize which sightings need further verification or professional follow-up. For bite-related concerns, pair any image-based result with clinical advice and, when necessary, expert confirmation.
Take the next step →Frequently asked questions
Can I identify a spider from a single phone photo?
You can often narrow a spider to a family or common group from a single clear phone photo if it shows important features like body shape and web context. For reliable species-level ID, multiple angles (especially a close-up of the eye area) are usually needed. If the image is blurry, partial, or lacks context, treat the result as a provisional identification.
What photos are most useful when you need an expert to confirm an ID?
Experts want a set of images: a dorsal (top) view showing the whole body, a close-up of the eyes and front legs, a side or ventral view if safe, and a wider shot of the habitat and any web. Include a scale reference like a coin or ruler if you can do so safely. Also record date, time, and where the spider was found—those notes materially improve confirmation chances.
How can I tell a spider from a lookalike like a tick or harvestman?
Check body segmentation and leg count: spiders have two distinct body parts (cephalothorax and abdomen) and eight legs. Harvestmen appear to have a single fused body and long spindly legs; ticks are small, round, and typically lack the visible segmentation and leg posture of spiders. If the photo shows only legs or a partial body, it’s easy to confuse them, so take another image showing the whole specimen when possible.
When should I seek professional verification or medical help?
Seek medical attention for suspected spider bites that cause spreading redness, severe pain, fever, or systemic symptoms. For identification verification, contact a local extension service, university entomology department, or a qualified entomologist when legal, pest-control, or health questions hinge on species-level certainty. Preserve clear photos and any contextual notes to speed up expert assessment.