Flying Insect Identification
Flying Insect Identification: Visual Clues & Photo Checklist
Learn which visual clues a photo can reveal for flying insect identification, and the safe follow-up checks to narrow a likely category before acting.
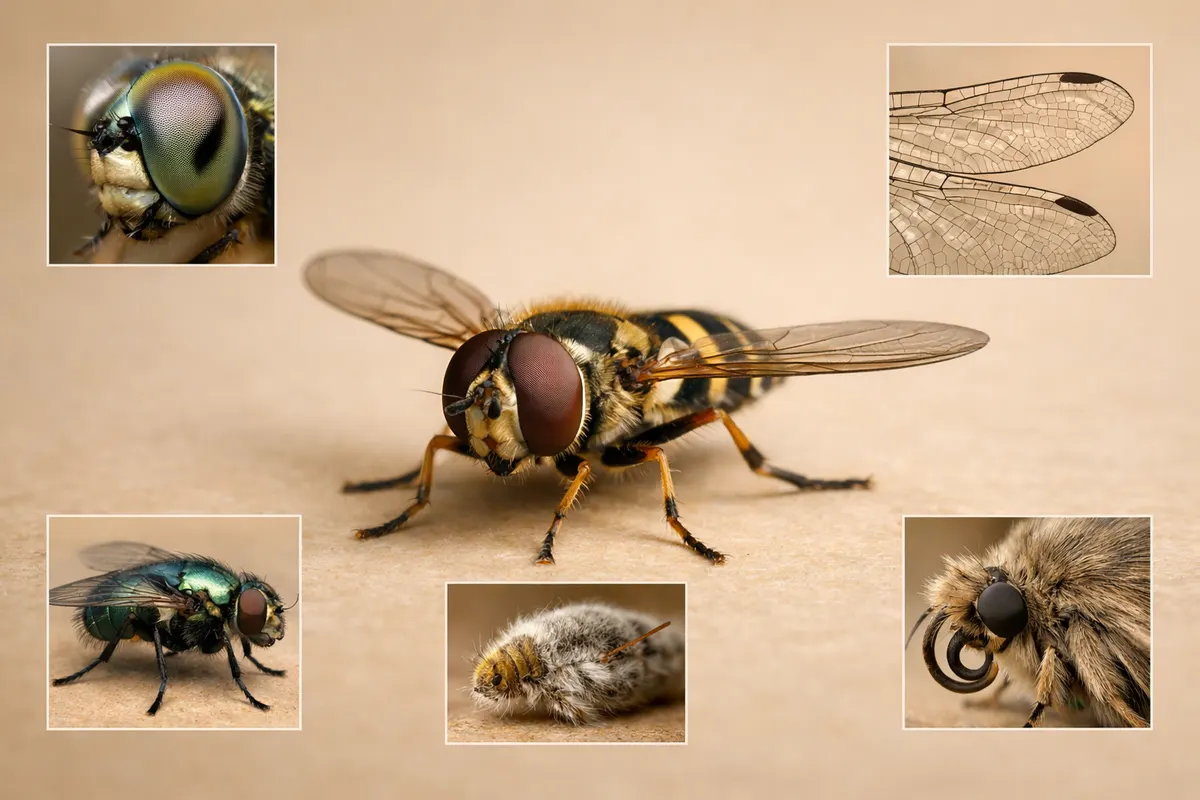
A single good photo can often narrow a flying insect to a category—bees, wasps, flies, moths, or hoverflies—by showing body segments, wing structure, and antennae. That first pass helps you decide whether an insect looks like a stinger risk or a harmless pollinator.
Start with outcomes: a photo identification will point to the most likely insect group, show the key visual clues driving that decision, and flag image quality issues that reduce confidence. It does not provide definitive scientific verification or an expert lab result from one photo.
When you need faster clarity—determining whether to avoid the area, protect pets, or photograph the nest—a photo-first approach is usually the fastest safe option. Make sure the image includes scale and multiple angles for a clearer result.

How identification works
Step 1
Snap a photo
Take a clear, well-lit photo of your item in the Bug Identifier app.
Step 2
Get an instant identification
The app reads the visible clues and returns the closest matches in seconds.
Step 3
Review the details
Compare the result with your photo, review any uncertainty, and check the suggested next steps.
Visual signals to check for flying insect identification
Before or alongside a photo ID, check the insect’s body plan and behavior. Count visible legs, note how the thorax and abdomen meet, and look for hairs or glossy cuticle—these signals quickly separate major groups.
Wing details often matter more than color. Single-pair wings with halteres indicate a fly, two pairs with visible venation point to bees, wasps, or moths. Antennae shape—clubbed, filamentous, or elbowed—gives a strong clue to family.
Scale helps. Include a common object (coin, ruler, finger) in one image so a distance estimate can be given. Multiple angles—dorsal, side, and a close-up of the head—reduce misidentification caused by foreshortening or shadow.
- Body segments and leg count: three clear body regions and six legs indicate an insect; how legs attach can separate wasps from flies.
- Antennae shape and length: look for elbowed antennae or long filamentous antennae as an early filter.
- Wing number and venation pattern: two wings plus halteres = fly; two pairs with visible veins = bee/wasp.
- Behavior and posture: hovering, slow wingbeats, or resting with wings folded can be diagnostically useful.
- wasp identification: look for a narrow ‘petiole’ waist, smooth shiny body, and distinct wing venation visible in a clear photo.
- paper wasp identification: check for slender bodies, long legs that hang during flight, and the hexagonal comb-like nesting material if visible.
What a flying insect identification result includes
A practical identification result lists the likely category, the key features seen in the photo, and a confidence level with clear caveats. The goal is to tell you what the photo proves and what remains uncertain.
Results also include suggested next checks you can do safely—photograph the underside, get a side profile, or note habitat and behavior—and safety guidance if a stinging species is possible.
When available, the result shows 2–4 visually similar species or groups and highlights the distinguishing details to look for in follow-up photos. If an image is too blurry or lacks scale the report explicitly requests better shots.
- Likely category and confidence band (low / medium / high) with reasons.
- Key visual clues called out (e.g., antennae type, wing venation, petiole waist).
- Similar species list with short distinguishing notes for each candidate.
- Photo quality feedback and exact next-angle requests (dorsal, head close-up, scale).
- Safety notes and basic precautions if a stinging group is suspected.
- Links to example visual-check resources like Insect Visual Checklist and Common Household Bugs for deeper clues.
Bald faced hornet and common flying insect lookalikes
Certain insects are commonly confused in photos. For example, a white-faced yellow jacket often called a bald faced hornet can be mistaken for other yellow-and-black wasps or even large flies when the photo lacks a clear head or side view.
Hovering flies and bee-mimicking flies are another frequent source of error; photos that capture wing number and halteres quickly resolve these. Similarly, paper wasps may look like non-stinging solitary wasps unless the nest or leg posture is visible.
A good close-up of the head and a clear view of the waist region are the most diagnostic shots for resolving these lookalikes. If you can’t get a close shot safely, describe size, habitat, and behavior to the identifier instead.
- Bald faced hornet vs yellow jacket: head pattern and nest shape differ; hornets often build enclosed paper nests and have a distinct white facial marking.
- Bee vs bee-mimicking fly: check for two wings and halteres (flies) versus four wings and pollen-carrying hairs (bees).
- Paper wasp vs solitary wasp: paper wasps often have long, dangling legs in flight and visible hexagonal nest cells when nesting is present.
- Moth or butterfly confusion: wing scales and resting posture (folded vs flat) help separate these from wasps and bees in photos.
Frequently asked questions
How can I tell if a flying insect is dangerous to people or pets?
Photos can indicate groups that statistically contain stingers—wasps, hornets, and some bees—by showing a narrow waist, smooth body, or aggressive nesting. A clear image of the abdomen, head, and a scale for size helps the identifier give safety guidance, but a single photo cannot guarantee behavior or venom risk; treat ambiguous cases cautiously and avoid close handling.
What photo angles help the most for accurate flying insect identification?
Take a dorsal (top) view, a side profile, and a close-up of the head with scale when possible. The dorsal shot shows wing venation and body pattern, the side profile reveals the waist and leg posture, and the head close-up clarifies antennae and mouthparts—these three angles substantially increase identification confidence.
When should I suspect a mud dauber wasp, and what should I check?
Suspect a mud dauber wasp when you see a slender, cylindrical abdomen, long narrow waist, and a solitary mud nest of small tubes on sheltered walls. Photograph the nest structure and capture a side profile of the insect; note that mud dauber wasps are generally non-aggressive but the photo alone is used only to suggest likely behavior, not to guarantee it.
Can I identify a nest or colony from a single photo of an insect?
A single insect photo can hint at nesting behavior—paper wasps often fly near comb-like nests; bald faced hornet colonies inhabit large enclosed paper nests—but photos of the nest itself or multiple insects together are much more reliable for colony-level identification. If you suspect a nest that poses a risk, treat it cautiously and consider professional removal advice.
Related guides
Get a photo-first flying insect identification
After narrowing the visible clues, use Bug Identifier to upload the photos you captured from different angles and get a categorized, evidence-backed first pass. The tool highlights the features used in its suggestion and tells you which follow-up shots will improve confidence. Start at https://bug-identifier.app/tools/bug-identifier and follow the safe-photo tips above before submitting a photo.