Common Household Bugs: Shape, Color, Habitat, and Next Checks
Learn which visual clues reliably indicate common household bugs, which signals are weak, and the practical next checks to narrow down likely matches.
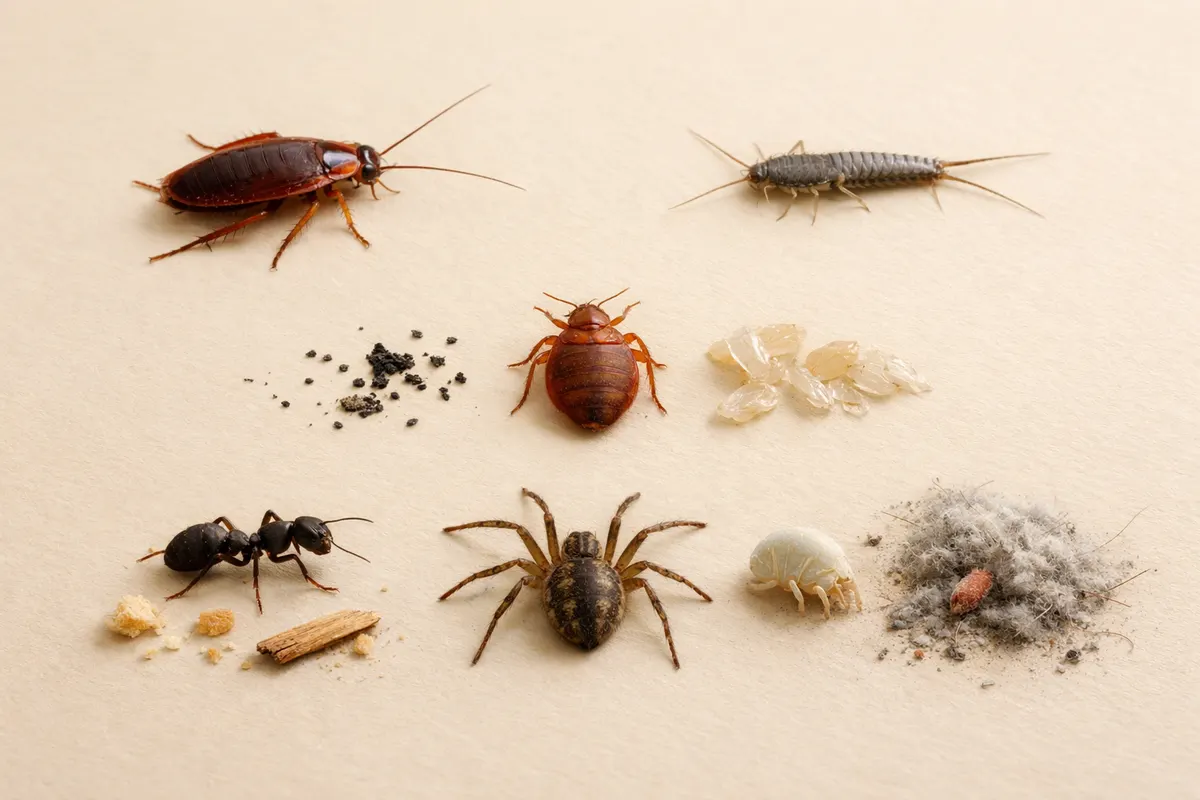
Quick answer: Which clues matter most for common household bugs
When trying to make sense of common household bugs from a photo, the most reliable clues are shape, leg and antenna arrangement, surface texture (hard shell versus soft body or scales), and the immediate habitat where you spotted the specimen. These features are structural and rarely change with lighting or brief camera blur, so they survive most phone photos and give the best first hints about what you’re looking at.
Size and proportion are also powerful when you can add a scale reference — a coin, a ruler, or the width of a finger. A small oval beetle a few millimeters long suggests different families (e.g., carpet beetle, pantry weevil) than a 10–20 mm dark beetle with visible elytra. Behavior and associated signs — droppings, shed skins, webbing, or damage to fabrics and food — are equally important because many lookalike species differ in where they live and what they eat.
A single photo can rarely prove a precise species on its own. Treat an initial ID as a working hypothesis: collect a few additional clues (another angle, a photo of the habitat, notes on when and where you found it) and use those to narrow possibilities. That approach keeps expectations realistic while letting you move quickly from guess to a useful next step.
Strongest visual clues
For common household bugs, prioritize structural traits that don’t vanish when a photo is slightly out of focus or shot in low light. Body outline — whether elongated and tapered, flattened and oval, or clearly segmented into head, thorax, and abdomen — is the fastest structural shortcut. For example, silverfish keep a teardrop outline with three tail bristles, while cockroaches have broad, flattened bodies and long antennae.
Leg and antenna counts and placement matter. Ants show elbowed antennae and a narrow ‘waist’ (one or two nodes) visible in good photos; beetles have straight antennae set at the head margin and a hard back (elytra). Spiders are immediately distinct because of eight legs and two body parts, whereas true bugs (Hemiptera) often have a beak-like mouthpart and a characteristic wing overlap on their backs.
Surface texture and body coverings are strong clues. Look for hard, shiny elytra (beetles), powdery or scaly wings (many moths), soft segmented bodies with visible cerci or tail bristles (silverfish), or obvious hairs and tufts on larval stages (carpet beetle larvae). These textures usually show up even if color is washed out or the photo has glare.
Contextual habitat clues increase confidence. A small moth fluttering near pantry jars in summer is more likely a pantry pest than an ornamental moth; a tiny brown oval crawling in flour points toward stored-product beetles or weevils. The combination of shape + texture + location provides a robust shortlist of likely groups to compare against.
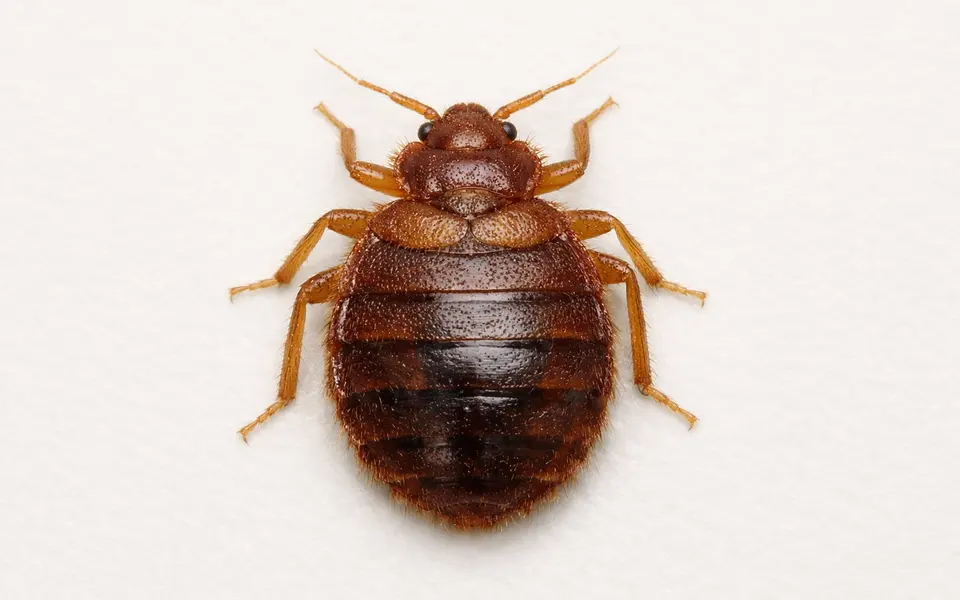
- Outline and silhouette: teardrop, oval, elongated, flattened — quick group clues.
- Antennae shape: elbowed vs straight vs clubbed (ants vs beetles vs some moths).
- Leg count/placement: visible in many phone photos and separates spiders, insects, and myriapods.
- Elytra or wing texture: hard shell vs scaly/fuzzy wings vs soft bodies.
- Associated evidence: droppings, frass, webbing, damage to fabric or food.
Weak signals
Color is one of the most misleading clues for common household bugs because it changes with lighting, camera white balance, and surface sheen. A brown insect shot in tungsten light may look orange; metallic reflections and iridescence can turn a dark beetle into a near-black blur. Use color as a supporting clue only after you’ve checked structural features.
Single-angle photos and glare create false impressions. A top-down shot may hide key structures like the waist of ants or the folded wing pattern of true bugs. Likewise, flash can flatten textures and blow out scale detail on moths, masking the very features that separate an innocuous clothes moth from a decorative or migratory species.
Small size without scale reference is another weak signal. Many pantry pests and carpet beetles are just a few millimeters long; without a coin or ruler they’re easy to mistake for household debris or tiny seeds. Also be aware of dead specimens: dead insects can curl, lose setae, or appear darker, producing an inaccurate impression of posture or behavior.
- Color shifts from lighting, camera settings, or age of specimen.
- One angle hides important diagnostic structures (underside, mouthparts, waist).
- Blurry photos remove texture clues like fine hairs, scales, or tiny spines.
- Isolated fragments (wing or leg) are poor bases for a full identification.
- Dead, crushed, or dried specimens may change shape and color.
Comparison workflow
Turn visual clues into a short elimination checklist. Start with habitat and behavior: where did you find the bug (kitchen pantry, carpet, window sill, bathroom drain)? Did it fly, run, hide in cracks, or appear on a plant? Those answers should immediately rule in or out large groups: flying moths and beetles, crawling roaches and ants, or plant pests.
Next, check durable structural features in sequence: overall outline, number and placement of legs and antennae, presence of wing covers (elytra) or scale-covered wings, and distinctive tail structures (cerci, bristles). Use each confirmed feature to eliminate groups that lack it. For example, finding hard elytra rules out moths and silverfish and narrows you to beetles and some true bugs.
Bring in secondary clues only after structure and habitat: size with scale reference, associated signs (frass, shed skins, notched leaves), and seasonality (some pantry pests spike after harvest, moths are seasonal). If two candidate species still fit, compare the most reliable micro-features you can capture in a photo: antenna shape (filiform, clubbed), wing pattern edges, or leg spines.
If you still have multiple matches, document each unresolved question as a research note: note the specimen’s exact location, whether it was alive when photographed, and any visible damage nearby. Gather a second photo from a different angle or add a short video of movement — motion often clarifies limb count and behavior. This stepwise workflow turns an uncertain one-photo guess into a replicable ID process.
- 1) Habitat & behavior: immediate eliminator (where, what it was doing).
- 2) Outline & appendages: legs, antennae, tail bristles, wing covers.
- 3) Texture & coverings: scales, hairs, hard elytra vs soft wings.
- 4) Secondary signs: frass, damage, sheds, seasonality, and size reference.
- 5) If unclear: capture multiple angles, short video, and note living/dead status.
App workflow
After you collect the manual clues above, an app can be a useful second pass to suggest likely matches and point you to deeper references. Before using a scanner, gather two or three photos: one showing the habitat, one close-up of the dorsal view, and one from an oblique or lateral angle if possible. Include a scale object in at least one frame so the app’s size estimates and ID logic have context.
When you scan images in the app, treat the result as a ranked list of candidates rather than a final answer. Apps often weigh pattern and color strongly; because those features can mislead, combine the app suggestions with your checklist: does the suggested family match the antenna type, wing texture, and habitat evidence you observed? If not, use the app result as a pointer for further comparison instead of confirmation.
For uncertain or potentially risky finds (stinging insects, ticks, or signs of infestation), use the app result to assemble clearer evidence you can show an expert: multiple angles, scale reference, notes on behavior, and a short video. The app can speed the process of creating that evidence pack, but do not substitute an app’s top suggestion for professional verification when safety or property damage is involved.
If you want a walk-through checklist before scanning, see our Bug Visual Checklist: Common Clues, Lookalikes, and Next Steps (https://bug-identifier.app/blog/bug-visual-checklist). That guide expands the clues and lookalike notes used here and pairs well with a photo-first scan workflow.
- Collect 2–3 photos: habitat, dorsal, and oblique views; include a size reference.
- Use the app to generate candidate matches; compare those to your confirmed structural clues.
- Treat app suggestions as research notes—confirm with additional photos or expert help if needed.
- For stinging or infestation risks, assemble clear evidence before acting or contacting professionals.
Related guides
Next step: run your checklist, then scan with Bug Identifier
Use the checklist above to collect 2–3 photos (habitat, dorsal view, oblique/side) and include a size reference. Open Bug Identifier on your device, scan the images to generate candidate matches, and compare those suggestions to the structural clues and habitat notes you recorded. Treat the app results as research leads: confirm with additional photos or an expert when safety, health, or property damage is a concern.

Frequently asked questions
Can I identify a bug to species from one phone photo?
Usually not. One phone photo can often indicate the family or broad group (beetle, moth, ant, cockroach) if it clearly shows shape, antennae, and texture. Species-level ID often requires finer details—wing venation, antenna segments, genitalia, or microscopic scales—that a single image rarely captures. Use additional photos, notes on habitat and behavior, and secondary signs to build a stronger case before claiming a species name.
What’s the single most helpful extra photo to take after an initial shot?
A close lateral (side) view is often the most revealing because it shows body profile, leg placement, and any waist or constriction that distinguishes ants from termites or roaches. Lateral shots also expose underside features and mouthpart orientation that dorsal shots obscure. If you can’t take a side shot, add a short video of the specimen moving—motion frequently clarifies limb count and posture.
How should I handle potentially dangerous insects when collecting photos?
Safety first: keep a safe distance, don’t attempt to handle stinging or biting insects, and avoid trapping live stingers against your skin. Use a zoom or take photos through glass, and note the behavior (aggressive, defensive, slow-moving). For ticks or medically important species, photograph the specimen without touching it; if it’s attached to a person or pet, seek medical or veterinary advice rather than relying solely on a photo ID.
What clues separate pantry pests from harmless visitors?
Location and associated damage are key. Pantry pests like weevils, flour beetles, and Indian meal moths are usually found inside stored food packages, with notched grain, webbing, or fine dust (frass). Harmless visitors such as occasional moths or beetles in a pantry but with no food residue or damage are less likely to be breeding there. Combining a photo of the insect with images of the surrounding area and any damaged food helps confirm whether you have an active infestation.