
Red Spiders: How to Identify, Check Clues, and Act Fast
Tiny red spiders or mites? Compare size, body shape, legs and where you found them. Use clear photos to narrow possibilities before choosing a response.
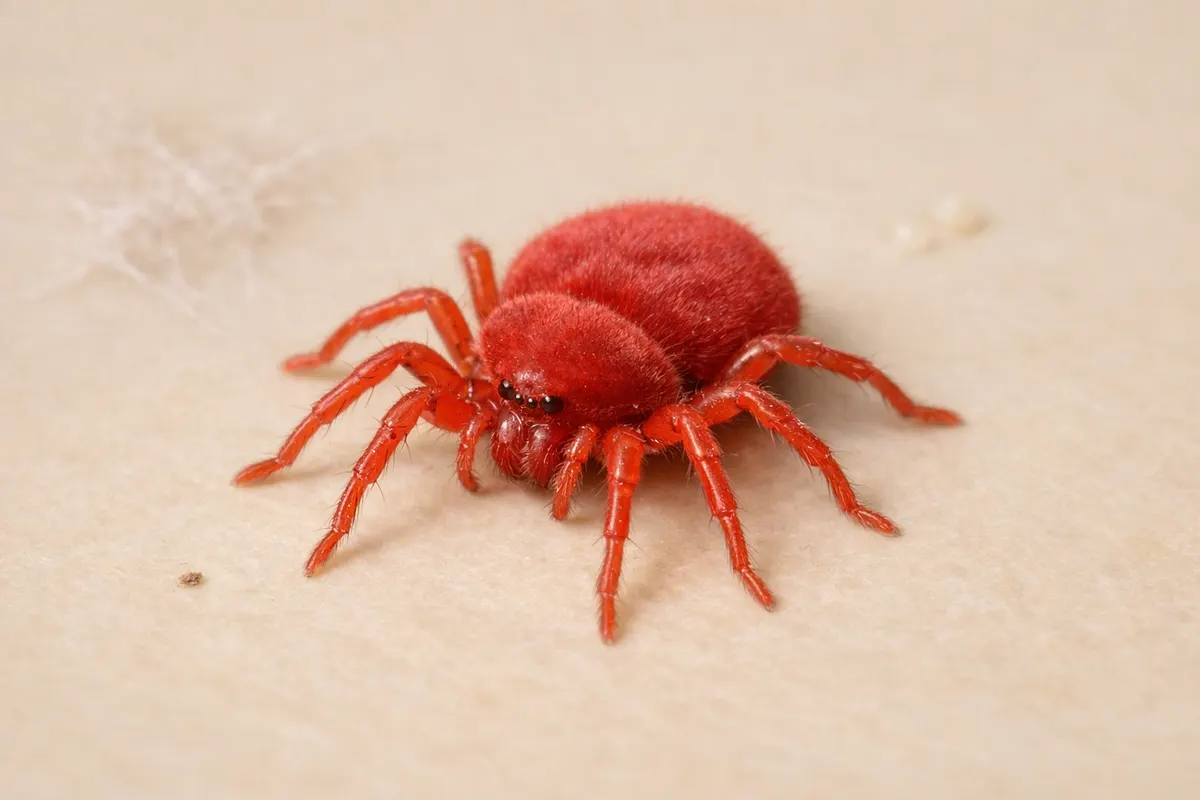
Quick answer: are these red spiders?
If you see small, reddish, eight-legged creatures in a home or garden photo, they could be a true spider, a mite, or another tiny arthropod. Size, body shape, leg length and the context (where the creature was photographed) give the first high-confidence clues.
High-confidence indicators that an image shows a spider include a clearly segmented body with an obvious cephalothorax and abdomen, eight visible legs (not six), and a posture where legs radiate from the body. If the creature is under 2 mm long, strongly translucent, or clustered in dense groups, it is more likely a mite or non-spider arthropod.
If you only have one blurry phone photo, treat any identification as provisional. Use the checklist below to raise or lower your confidence, and follow the step-by-step checks to gather the evidence needed before you decide how to act.
- Spider likely: two-part body, eight legs, distinct cephalothorax and abdomen.
- Mite or other arthropod likely: tiny (<2 mm), round/flattened body, often in clusters.
- Context matters: on plants, food, or bedding changes how you interpret risk and species.
What we mean by 'red spiders' in photos
People search for “red spiders” to describe several different creatures that look red and spider-like in a photo. That phrase often covers at least three groups: true spiders (order Araneae) with visible spider anatomy, spider mites (tiny plant-feeding arachnids in Tetranychidae), and small red insects such as clover mites or juvenile stages of other arthropods.
True spiders vary from a few millimeters to several centimeters. Many house spiders or garden orb-weavers show reddish tones in certain species or life stages. Spider mites, by contrast, are usually under 1 mm and are plant feeders; a photo of dust-like red specks across a leaf is more likely mites than spiders.
When we talk about identification in this article, we separate appearance (what the picture shows) from behavior and damage (where it was found, what it feeds on, and whether you see colonies or bite marks). That separation keeps an image-based identification grounded and prevents overconfident treatment advice based on a single photo.
- True spider: visible two-part body and eight separate legs, often solitary or in small numbers.
- Spider mite: tiny (<1 mm), often on leaves in colonies causing stippling or webbing.
- Other lookalikes: clover mites, ticks, or tiny beetles can appear red but differ in legs, shape, or grouping.
Key clues
Start with size and scale. Add a coin, ruler, or ruler-like object next to the subject and retake a photo if you can. Size rules out many lookalikes: anything under 2 mm is rarely a garden spider and more often a mite or tiny insect.
Examine body segmentation and leg count. Spiders have two main body parts (cephalothorax and abdomen) and eight legs emerging from the front segment. Mites and ticks often appear as a single oval body with legs close to the sides and can be mistaken for tiny dots at low resolution.
Look for webbing, colonies, and feeding damage. Spider mites usually appear in groups on the underside of leaves and produce fine webbing when abundant; true spiders rarely form dense colonies on leaves. If you see stippling, bronzing, or webbing on plants, prioritize an identification as mites.
Note the location and time. Indoors on bedding or near walls suggests different species than clusters on houseplants or garden foliage. Seasonal timing matters too: many mite outbreaks peak in warm, dry weather while some small spiders are more visible in fall when they wander or mating occurs.
- Size: <1–2 mm → likely mite; ≥3 mm → candidate spider.
- Legs: eight distinct, jointed legs that radiate from a front segment indicate spiders.
- Body shape: two-part body vs. round/flattened single body.
- Grouping: single/solitary vs. dense colonies suggests spider vs. mite.
- Damage/webbing: stippling or webbing on plants points to spider mites.
Step-by-step checklist to verify red spiders in photos
Follow these steps in order to move from a tentative photo-based guess to a higher-confidence conclusion. Treat any single step that fails (for example, a blurry photo) as a red flag that you need more evidence before deciding on treatment or escalation.
If you can retake photos, try multiple angles and both close-up and contextual shots. For very small subjects, a macro mode or attaching a low-cost clip-on macro lens to your phone often delivers the difference between ambiguous and diagnostic images.
If photos remain inconclusive, collect simple contextual evidence: where exactly was the creature (plant species, indoor surface, stored food), whether you see multiple specimens, and whether there's visible damage. These facts often point to different risk categories and next actions.
- Step 1 — Capture scale: include a coin, ruler, or leaf in the frame to show size.
- Step 2 — Improve clarity: use macro if available, steady the camera, and take multiple shots from different angles.
- Step 3 — Check posture and legs: count legs in high-resolution images and look for separation between cephalothorax and abdomen.
- Step 4 — Inspect surroundings: look for webbing, leaf stippling, or clusters; photograph both the close-up and the surrounding surface.
- Step 5 — Compare with common lookalikes: use trusted field photos to compare posture and scale before naming species.
- Step 6 — Decide next action: if identification remains uncertain and the issue involves infestation or bites, escalate to a local expert or consider targeted sampling for lab verification.
Examples
Example 1 — A red dot on a houseplant leaf: close-up shows many tiny red specks clustered along the vein with faint silk. Interpretation: spider mites (Tetranychus spp.) are the top candidate. Action: check underside of leaves, photograph several leaves, and note plant symptoms such as yellow speckling or webbing.
Example 2 — A 4–6 mm reddish spider on a wall: photo shows a clear two-part body and eight long legs, photographed alone near a window. Interpretation: a small house spider or juvenile orb-weaver that happens to be reddish. Action: no plant damage expected; if it’s indoors and unwanted, capture and release or consult spider-care guidance rather than pesticide-first responses.
Example 3 — Dozens of tiny red dots on outdoor concrete near windowsill: photos show many minute rounded dots that move slowly when disturbed. Interpretation: clover mites or similar small herbivorous mites invading in large numbers. Action: sweep or vacuum, seal entry points, and address nearby vegetation if populations recur.
- Plant leaves with stippling + webbing = spider mites likely.
- Solitary, visible 3–8 mm spider with radiating legs = true spider.
- Many non-moving red dots across surfaces = clover mites or other small arthropod invasions.
Limitations
Photos often cannot determine species-level identity for small arthropods. Many diagnostic features for mites and small spiders require microscopic examination (setae patterns, mouthpart shape, spinneret arrangement) or live behavior. Treat any species-level claim from a single phone photo as provisional unless an expert confirms it.
Photos also cannot reliably establish toxicity, venom potency, or bite cause-and-effect. Bite reactions depend on human sensitivity and secondary infection, and images of bites or rashes require clinical evaluation rather than an image-based pest ID. If you suspect allergy, envenomation, or infection, consult a medical professional.
Environmental context and life stage are often missing in photos. For example, juvenile spiders may look different than adults, and mites in low-density samples can be missed entirely. When consequences matter (agriculture, health, structural infestation), combine photos with direct sampling or a local specialist inspection.
- High-confidence outcomes from photos: general group (spider vs. mite), presence of colonies, visible plant damage.
- Partial confidence outcomes: genus-level guesses, likely pest vs. harmless species, typical life stage (very small juvenile vs. adult).
- Low-confidence or impossible from photos alone: exact species ID for many mites and small spiders, venom toxicity assessment, medical causation of skin reactions.
Related guides
Next step: a fast photo check with Bug Identifier
After you collect clear photos and the contextual clues above, use Bug Identifier’s Spider Identifier tool to run a rapid photo-based check. Treat the tool as a quick, evidence-based second look that helps prioritize whether you need closer inspection or professional help. Try the Spider Identifier at https://bug-identifier.app/tools/spider-identifier for a guided photo check and next-step suggestions.
Take the next step →Frequently asked questions
Can red spiders in photos be dangerous to people?
Most tiny red arthropods photographed in homes are harmless to people. True spiders can bite but many small species have weak venom and rarely cause more than minor irritation. For any suspected bite with severe symptoms, consult a medical professional rather than relying on an image-based identification.
How can I tell spider mites from tiny red spiders on plants?
Look for size, grouping, and webbing: spider mites are usually under 1 mm, occur in colonies on the undersides of leaves, and may produce fine webbing and leaf stippling. True spiders are larger and usually solitary; if you see many uniformly tiny red dots across leaves, mites are the likeliest cause.
Are clover mites the same as red spiders?
Clover mites are tiny red mites that can invade homes and appear like a red dusting; they are not true spiders. They do not bite in a medical sense but can cause irritation if crushed on skin. Identification depends on scale (very small), behavior (many individuals moving together), and location (near turf or vegetation).
What should I do if I’m not sure what the photo shows?
Gather more evidence: take multiple well-lit photos including a scale object; photograph the surrounding area and any damage; note the substrate (plant species, fabric, wall). If uncertainty remains and the issue affects health or valuable plants, consult a local extension service or a pest professional for verification.